
Raised bed gardening does have some advantages over the traditional row method. They require less “good” soil and less tilling. They are spatially more efficient, in that they take up much less space than rows. And they need less maintenance, as there is a smaller area requiring weeding. But these advantages carry over from the Square Foot Garden technique, made famous by Mel Bartholomew. There are however added advantages of building up. In fact, in the All New Square Foot Gardening book Mel now recommends raised box constructions over in ground beds.
Hugelkultur? I hardly know her!
Raised beds are also great for Hugelkultur, a gardening technique involving the burial of decomposing logs beneath the beds, to serve as a continually renewing source of humus and as a means of retaining moisture for the plants above.
The Project:
Over the years as our garden has expanded, I built new beds post-hoc, without any particular consideration for how the garden worked as a whole. But last year we came up with a master plan to replace the varied assortment of existing beds with a standardized design. Read on, and I’ll tell you all about our new beds.
Reuse existing materials
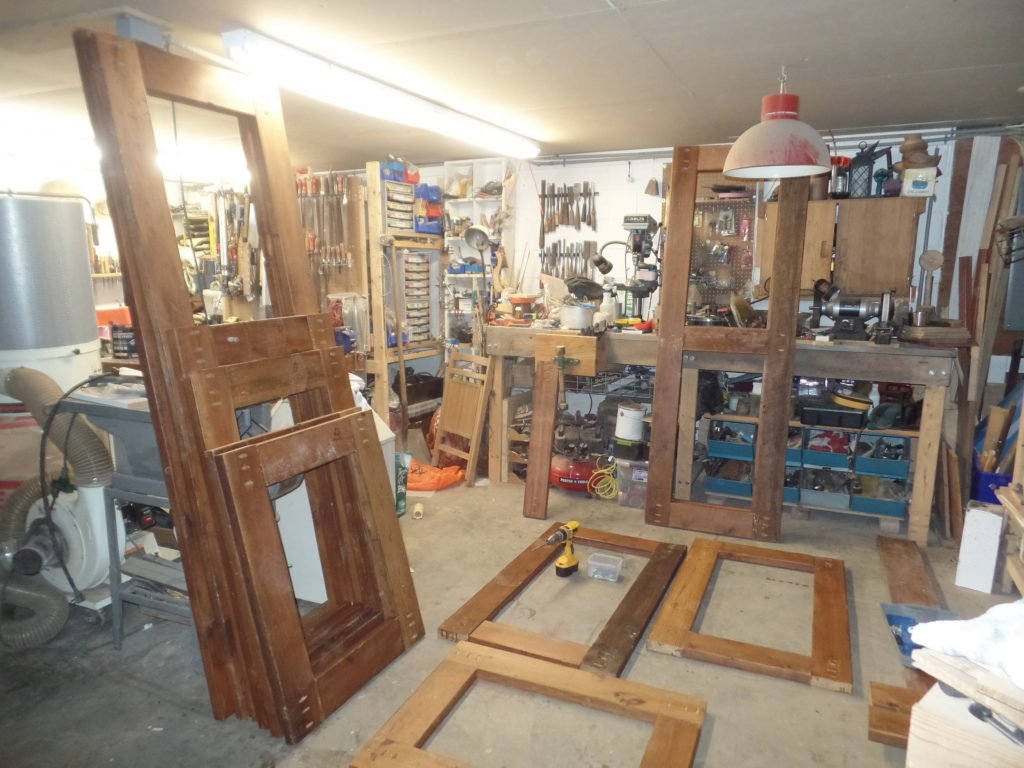
Reuse of old materials is very important to me, and this time I wanted to see just how far I could take that. I had a lot of old rusted sheet metal that I saved after repairing our shed roof. I knew I wanted to incorporate that metal into the design. I chose to make simple panel, using reclaimed lumber to provide structural support to the metal sheeting. These could be constructed in my work shop and then later assembled in place within our garden.
Lumber
Use what’s available: Second Chance, my source for reclaimed lumber always seems to have plenty of 2X6 boards.
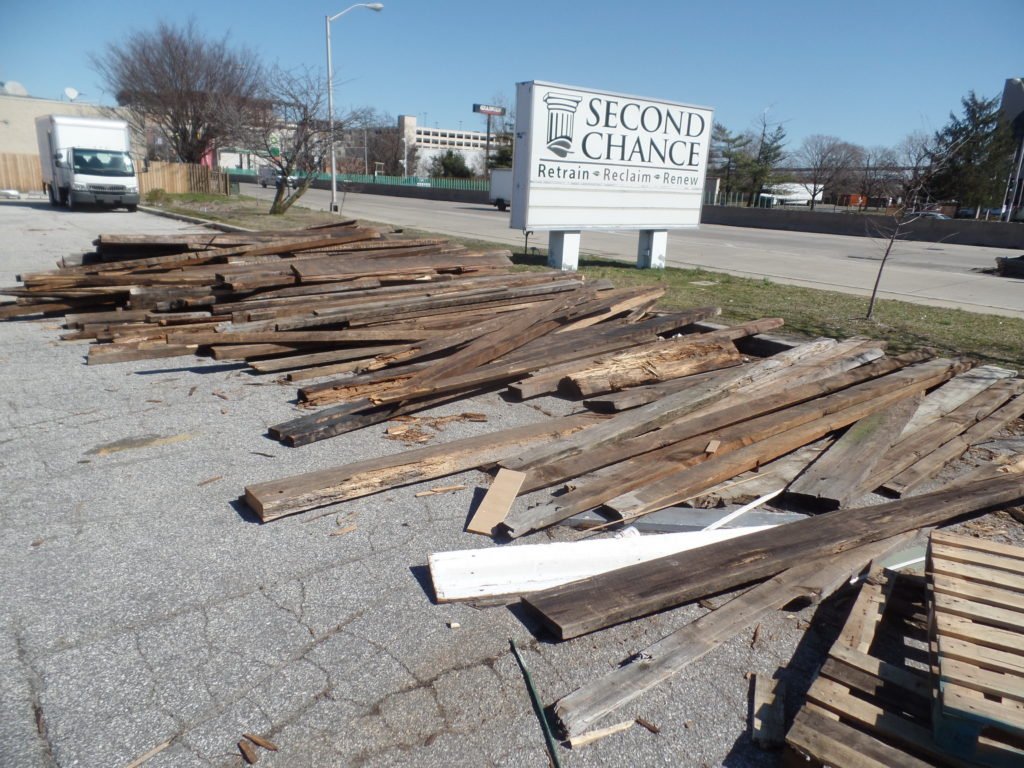
Save a tree: A 12 foot 2X6 reclaimed board costs $5.41 at Second Chance. New ones from Lowes are about $12.
Building the frames
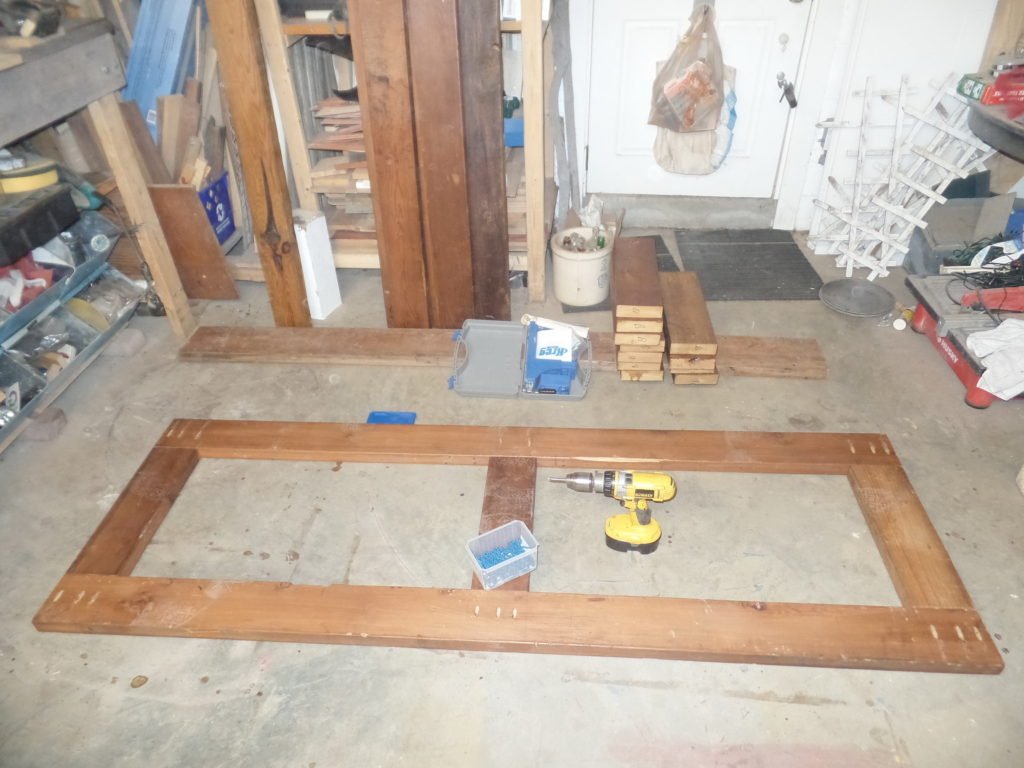
Our raised beds are L-shaped, each consists of 6 panels. I started the project by cutting to length all the wood that I would need to build the frames for the panels. I then drilled the holes for the fasteners to join the frames, applied wood sealer, and assembled the frames
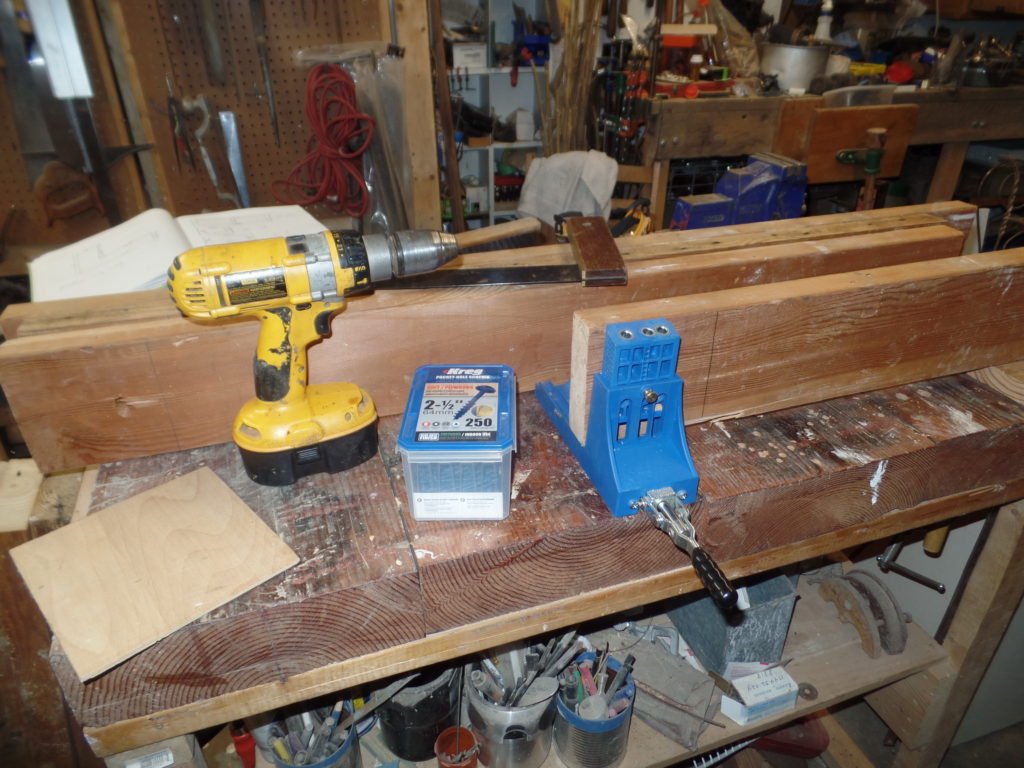
Fasteners
I prefer to use pocket hole screws when constructing joints on large casework like this. The Kreg Pocket Hole Jig is a good investment and easy to use. I purchased pocket screws made for outdoor use, but I’ve found that the regular ones typically outlive most outdoor projects.
Wood sealer
You would think that applying a finish is the last step, but doing it prior to assembly ensures that all surfaces get coverage. I’d like for these to last a while, so I applied a couple coats of wood sealer. The Susquehanna branch Habitat for Humanity’s Restore had new unopened cans for $1 (Cost about $30 a gallon elsewhere).
Joinery
I lay everything out on a flat surface. Clamping isn’t really necessary with pocket hole fasteners. Just line up the boards and apply some light pressure to hold them in place and the pocket hole screws will draw the joint closed.
Assembly
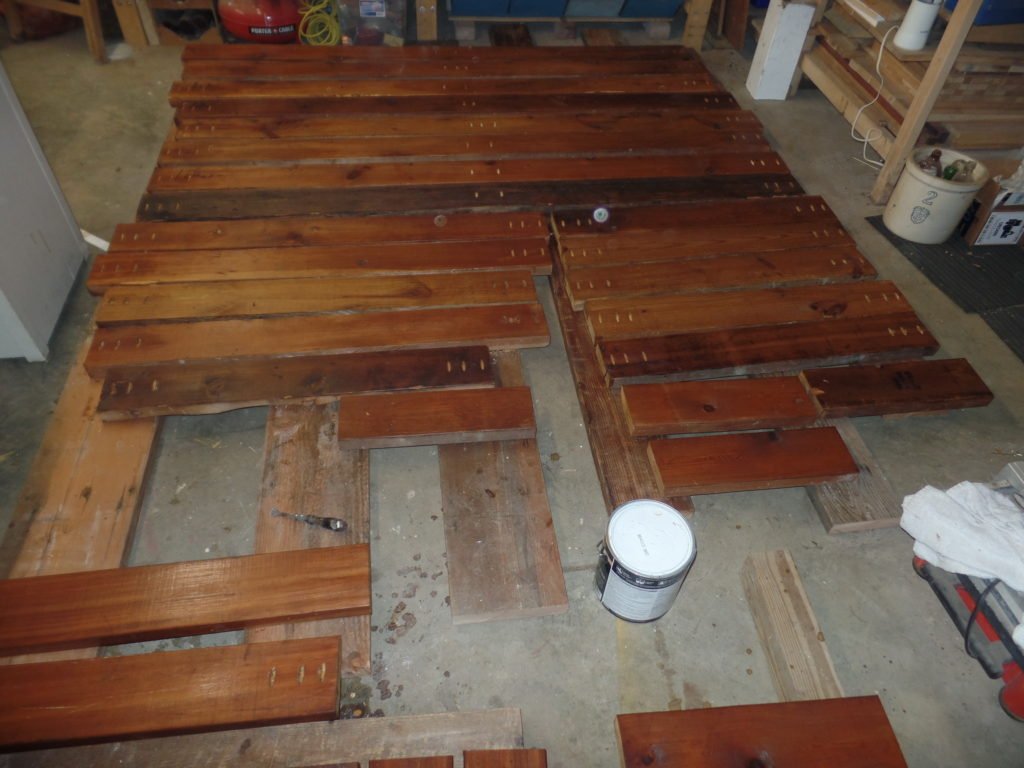
Here are several of the panels, stacked and set aside and ready for the next step.
Adding the metal panels
What initially inspired this project was my unwillingness to discard the well used sheet metal that I took from my shed’s roof during repairs. Although they were no longer suitable for roofing, they were still very strong. I eventually ran out of roofing metal. The remaining sheet metal came from a discarded washing machine.
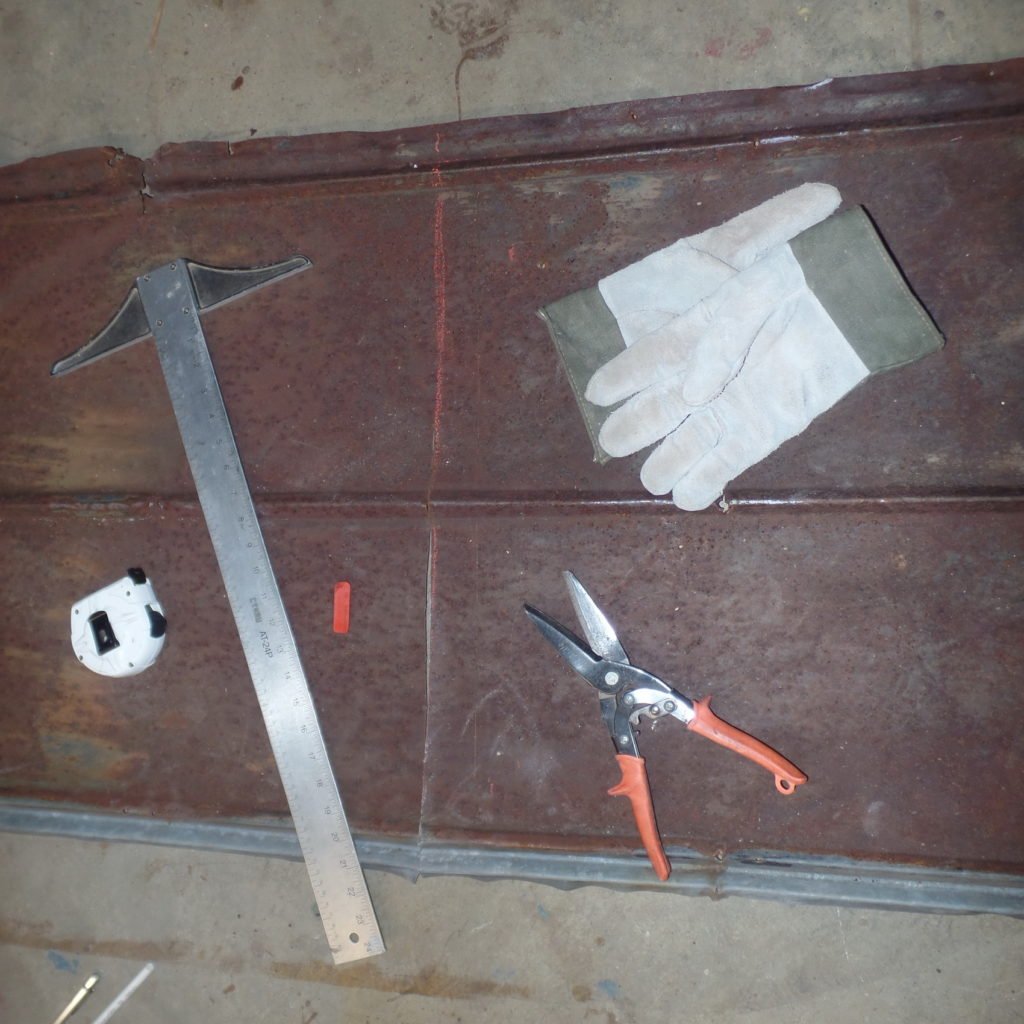
Cutting to length
I used tin snips to cut the sheets. Even after > 50 years exposed to the elements, this metal took a lot of work to cut. I used a lumber crayon to mark my line. Heavy gloves are a must when cutting rusty metal.

Cleanup
The metal looked good as is, but since we will be brushing up against the raised bed when we’re tending to the garden, I decided to clean all the loose bits of rust off and add a clear coat of finish.
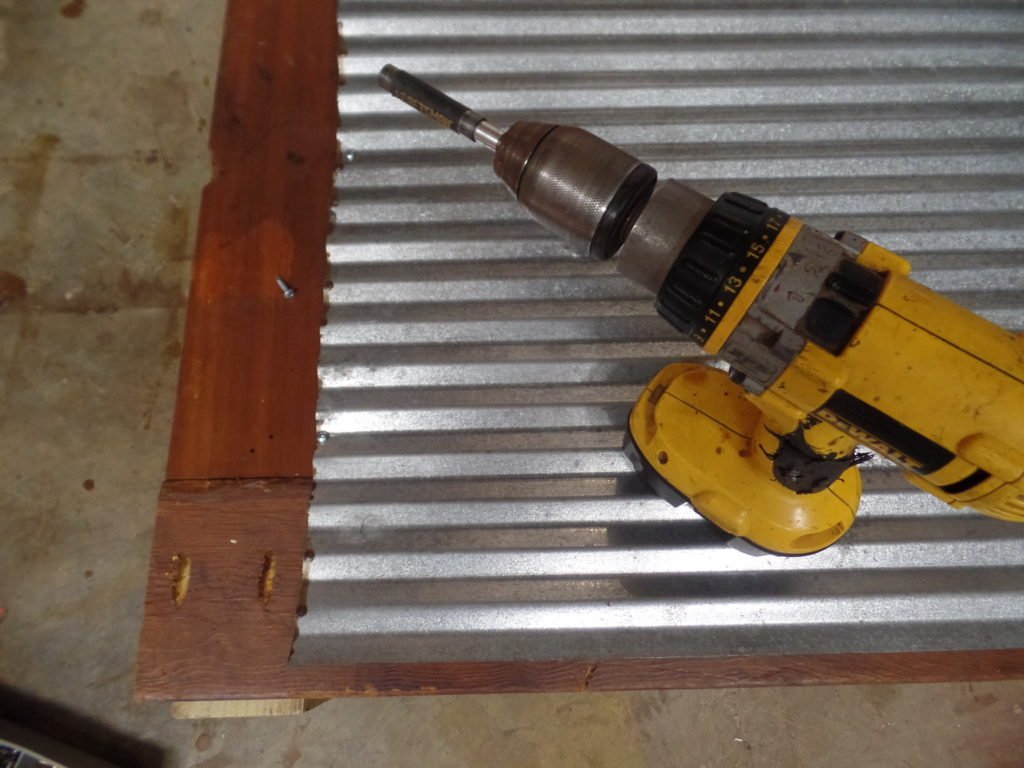
Fastening
I used self drilling sheet metal screws to secure the sheet metal to the frames. Most of these came off of an old washing machine that I dismantled.
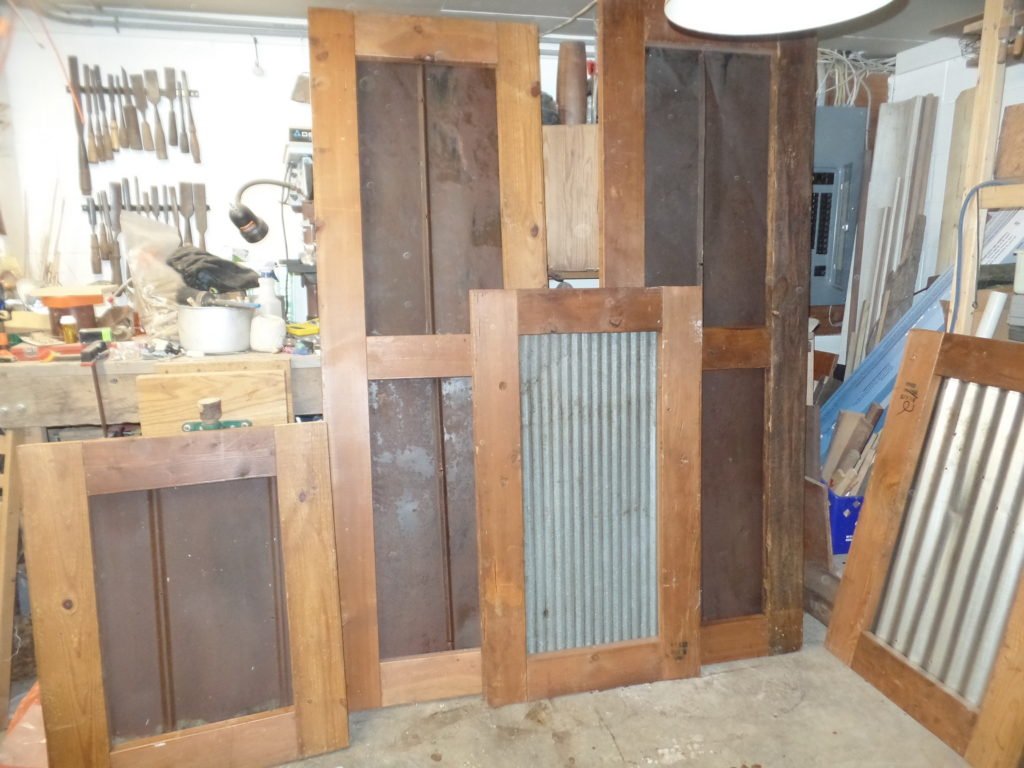
Completed panels
The panels stacked and ready for assembly into raised beds.
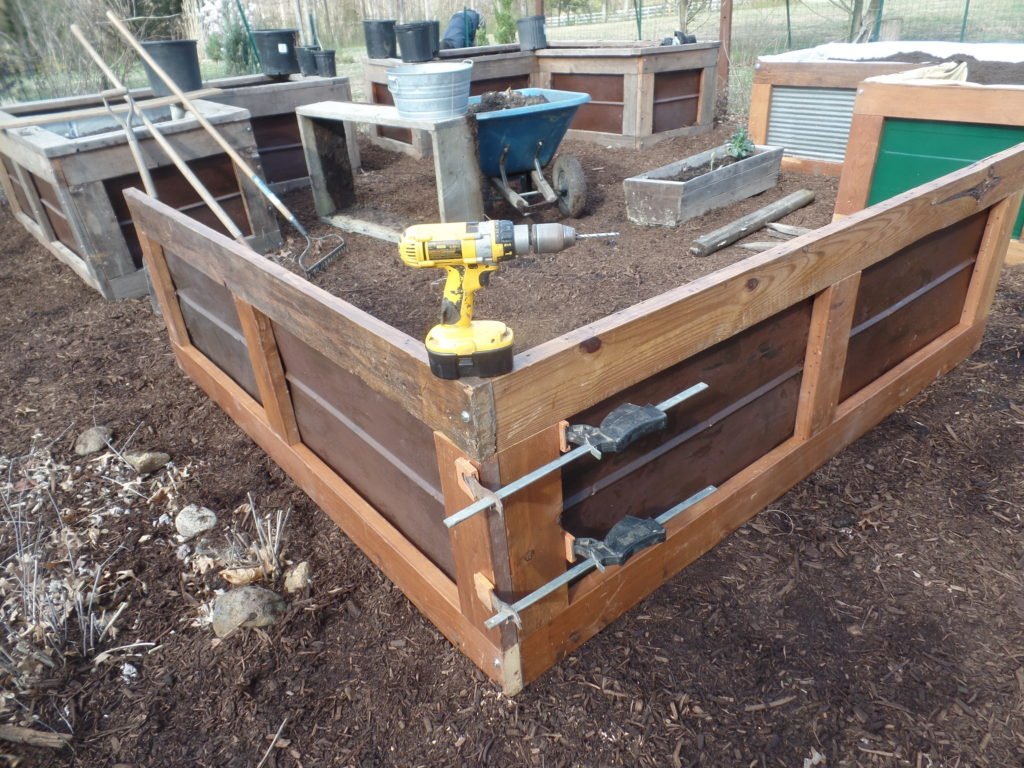
Assembling the Beds
In the construction of the panels, I used pocket hole screws to join the frames. Joining the panels required something more substantial. I used 4 inch long stainless steel lag bolts. Galvanized bolts are fine too. Either one will outlast the wood. Bolts and most other hardware items are cheaper if you buy by the pound.
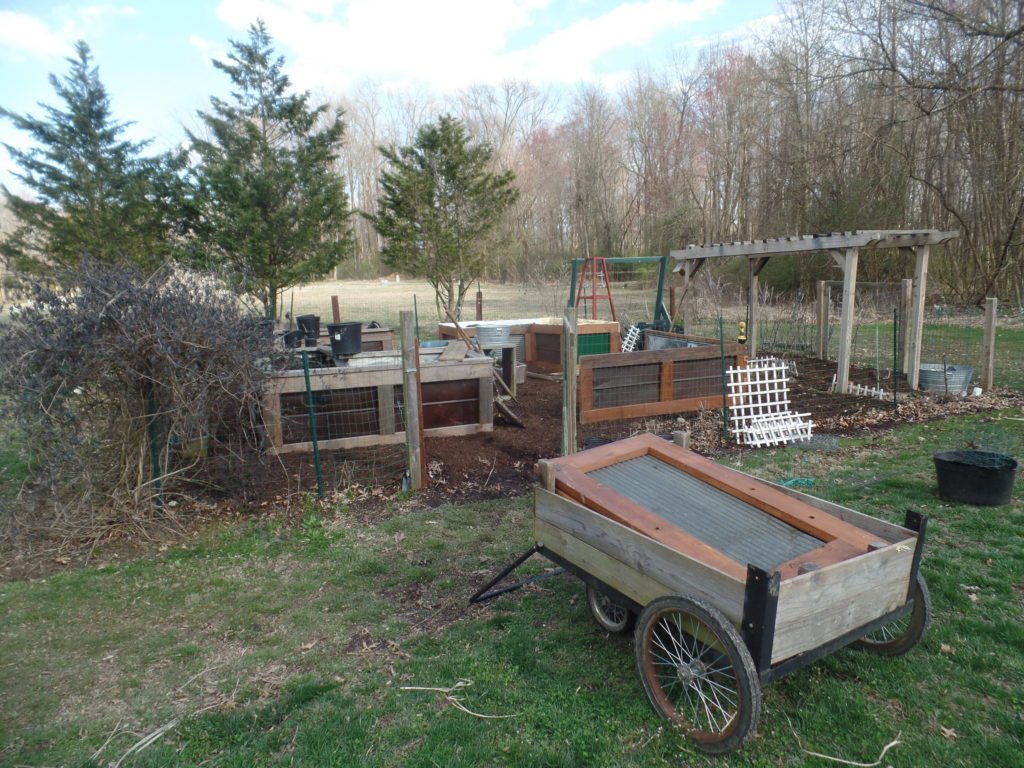
Transport
This cart is on it’s fourth reincarnation. Every few years the wood rots away and I reuse the wheels and hardware to build a new one.
Bolting the panels together
I used a couple of clamps to hold the panels together while I drilled pilot holes for the lag bolts.
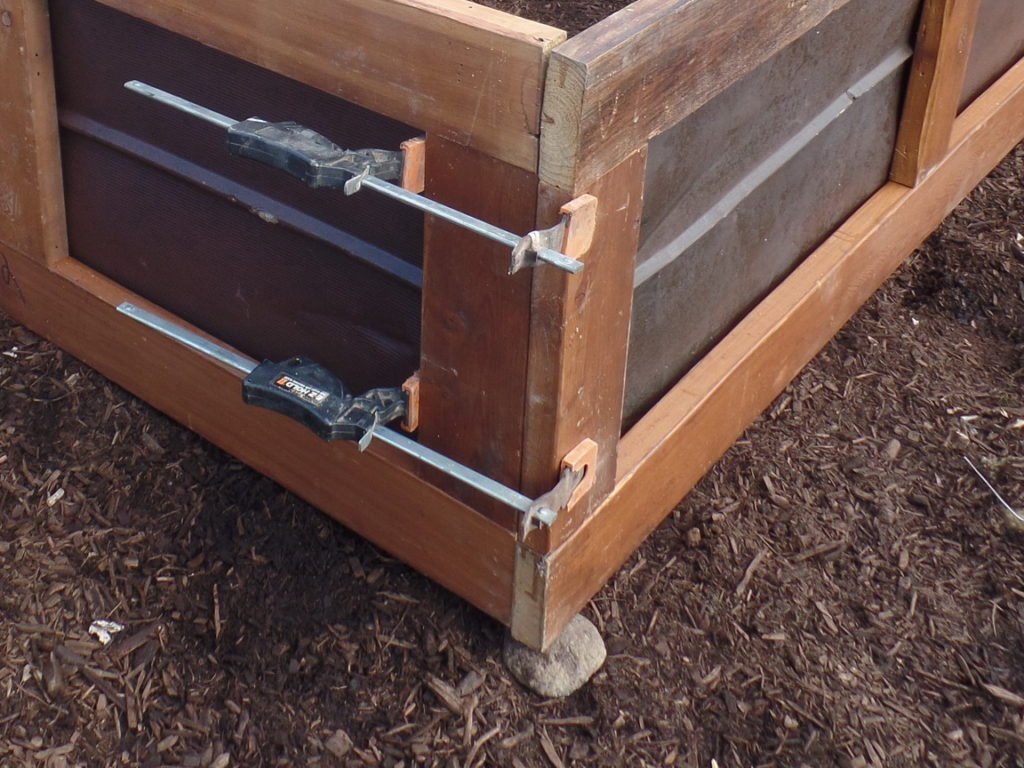
Leveling the beds
Our garden isn’t on the most level of surfaces. This had the effect of making the first two raised beds look slightly uneven. I tried to correct this problem while assembling the new beds by placing rocks and old landscaping timbers beneath the lower ends
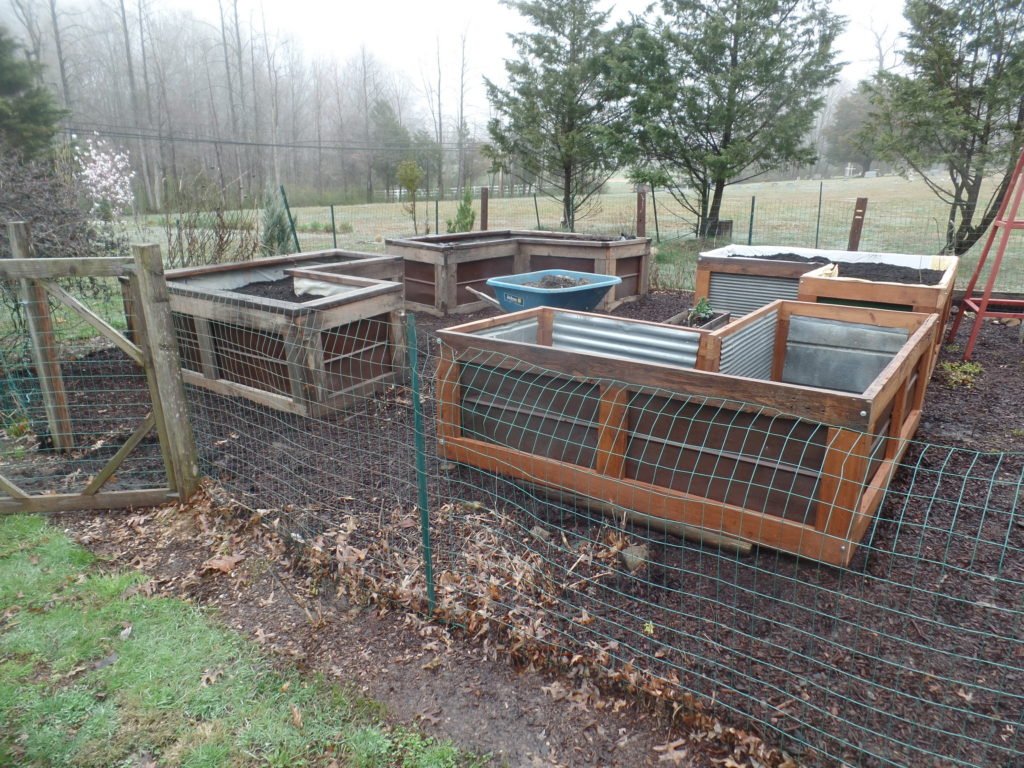
Completed assembly
Just a few more things to be done before this last one is ready to fill with soil.
Adding a layer of decomposing wood
As I mentioned before, this is known as Hugelkultur. I didn’t actually know that when I started this project. Mel Bartholomew, who literally wrote the book that inspired the modern home gardening movement maintains that you only need about 6 inches of good soil in raised beds. My beds are well over 2 feet tall. It would be a terrible waste to fill these entirely with good soil. Mel suggests filling the void with sand, but sand is heavy and I don’t have any. I do however have plenty of rotting wood and I was overjoyed to learn that this was not only an acceptable solution but also could serve a beneficial role in our garden. The wood retains moisture, reducing the need for watering and as it gradually breaks down it will replenish the soil nutrients.
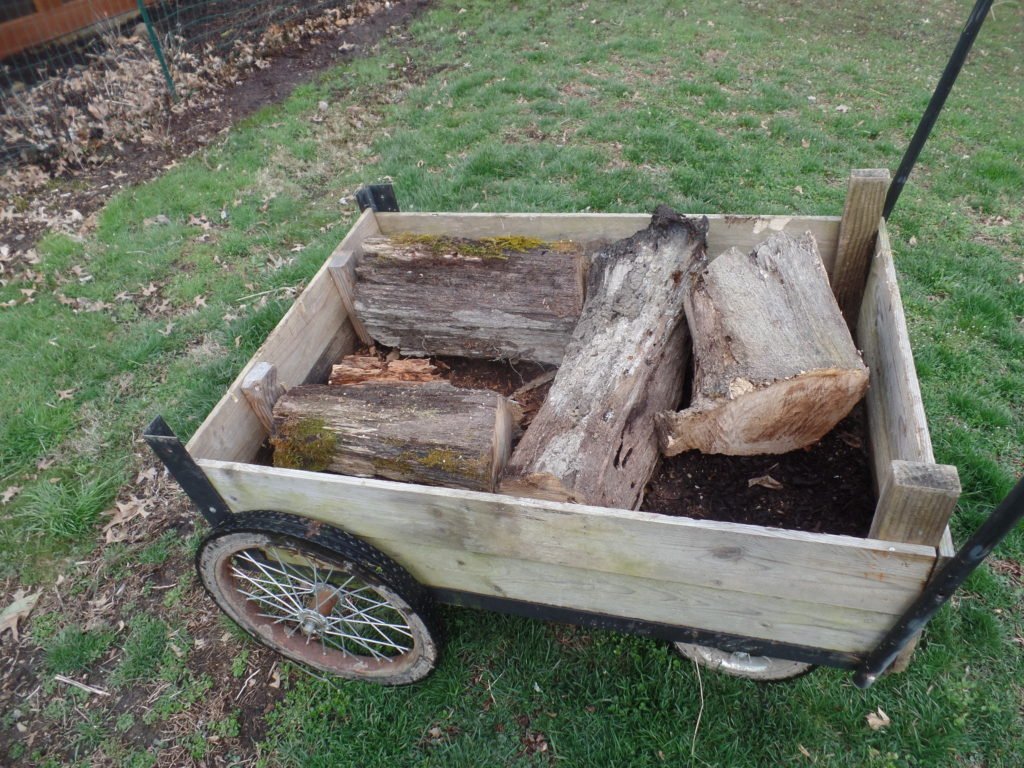
Rotting logs
This red oak fell long before we purchased our home. It was joined by a few maples and poplars that came down in the wooded part of our property during some heavy wind.

Barrier between structure and soil
I lined the beds with plastic sheeting. I had a roll of vapor barrier which I used on the first two beds. I still had more than enough to line the second two beds, but I decided instead to reuse some plastic sheeting that was previously used to wrap wood pellets. It’s nice thick plastic, that usually goes straight into the land fill after a single use.
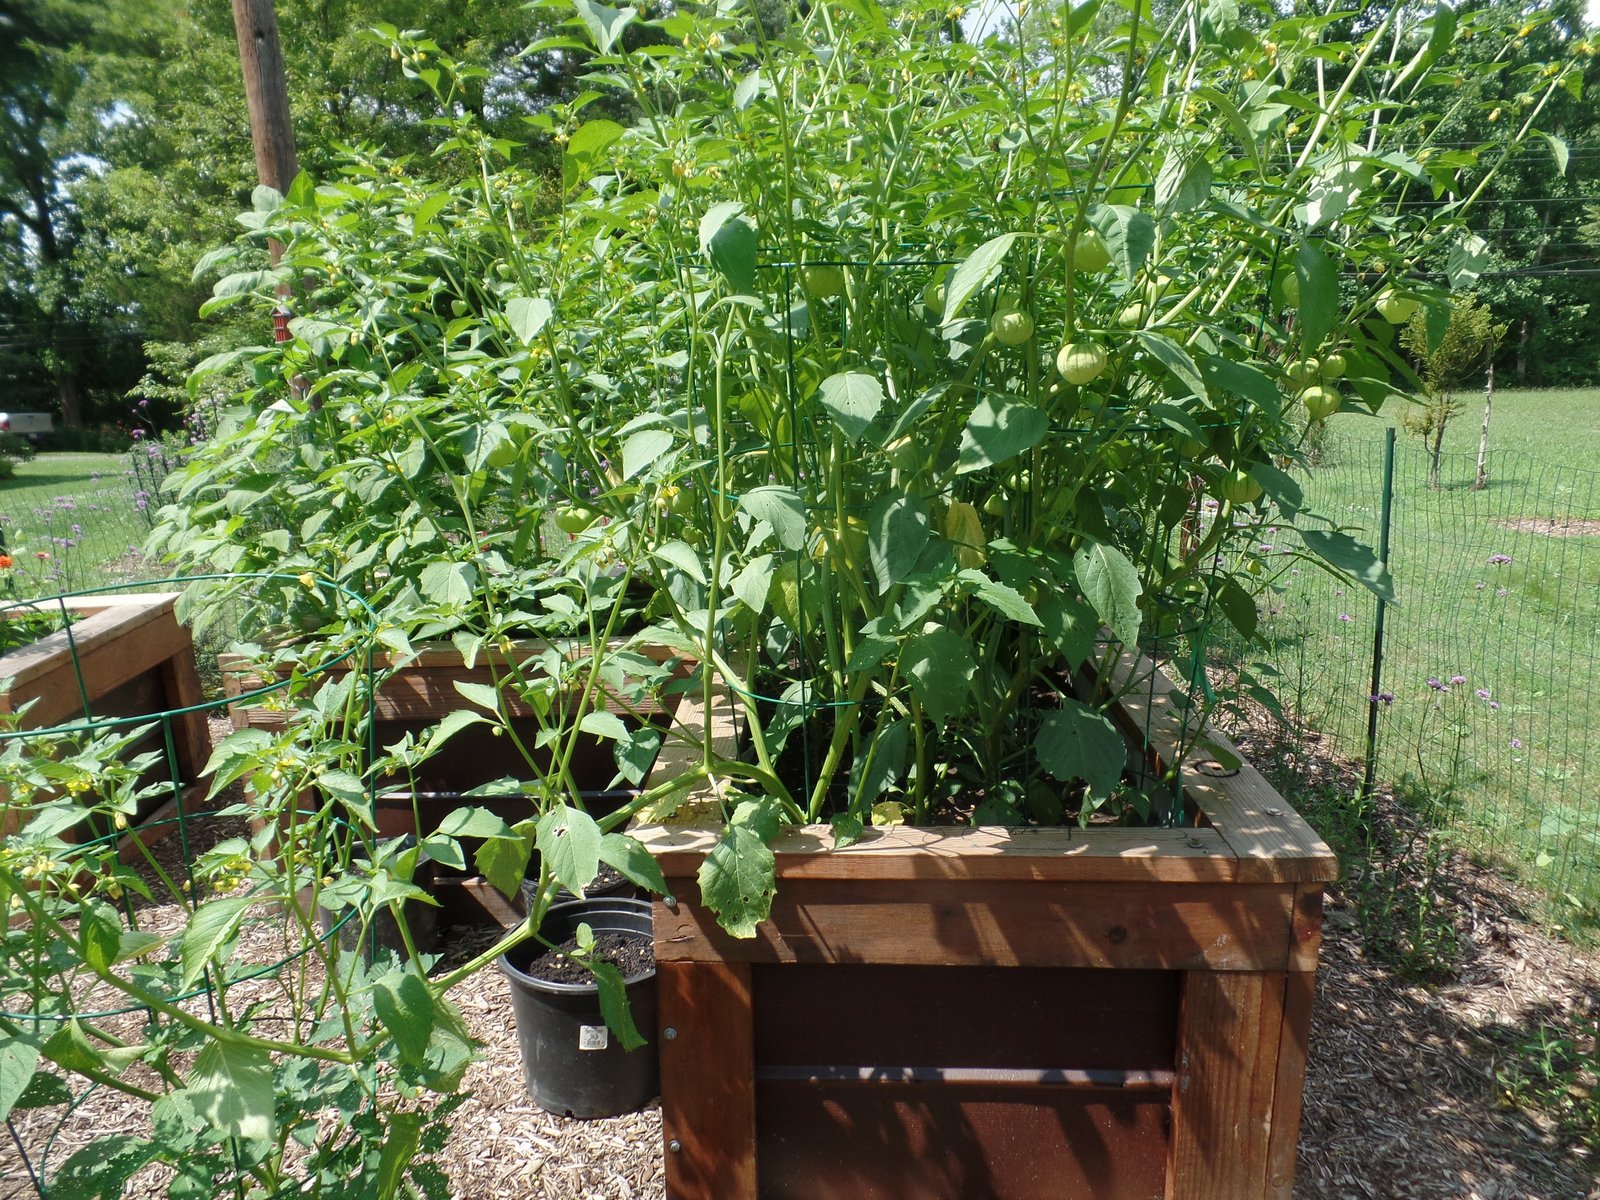
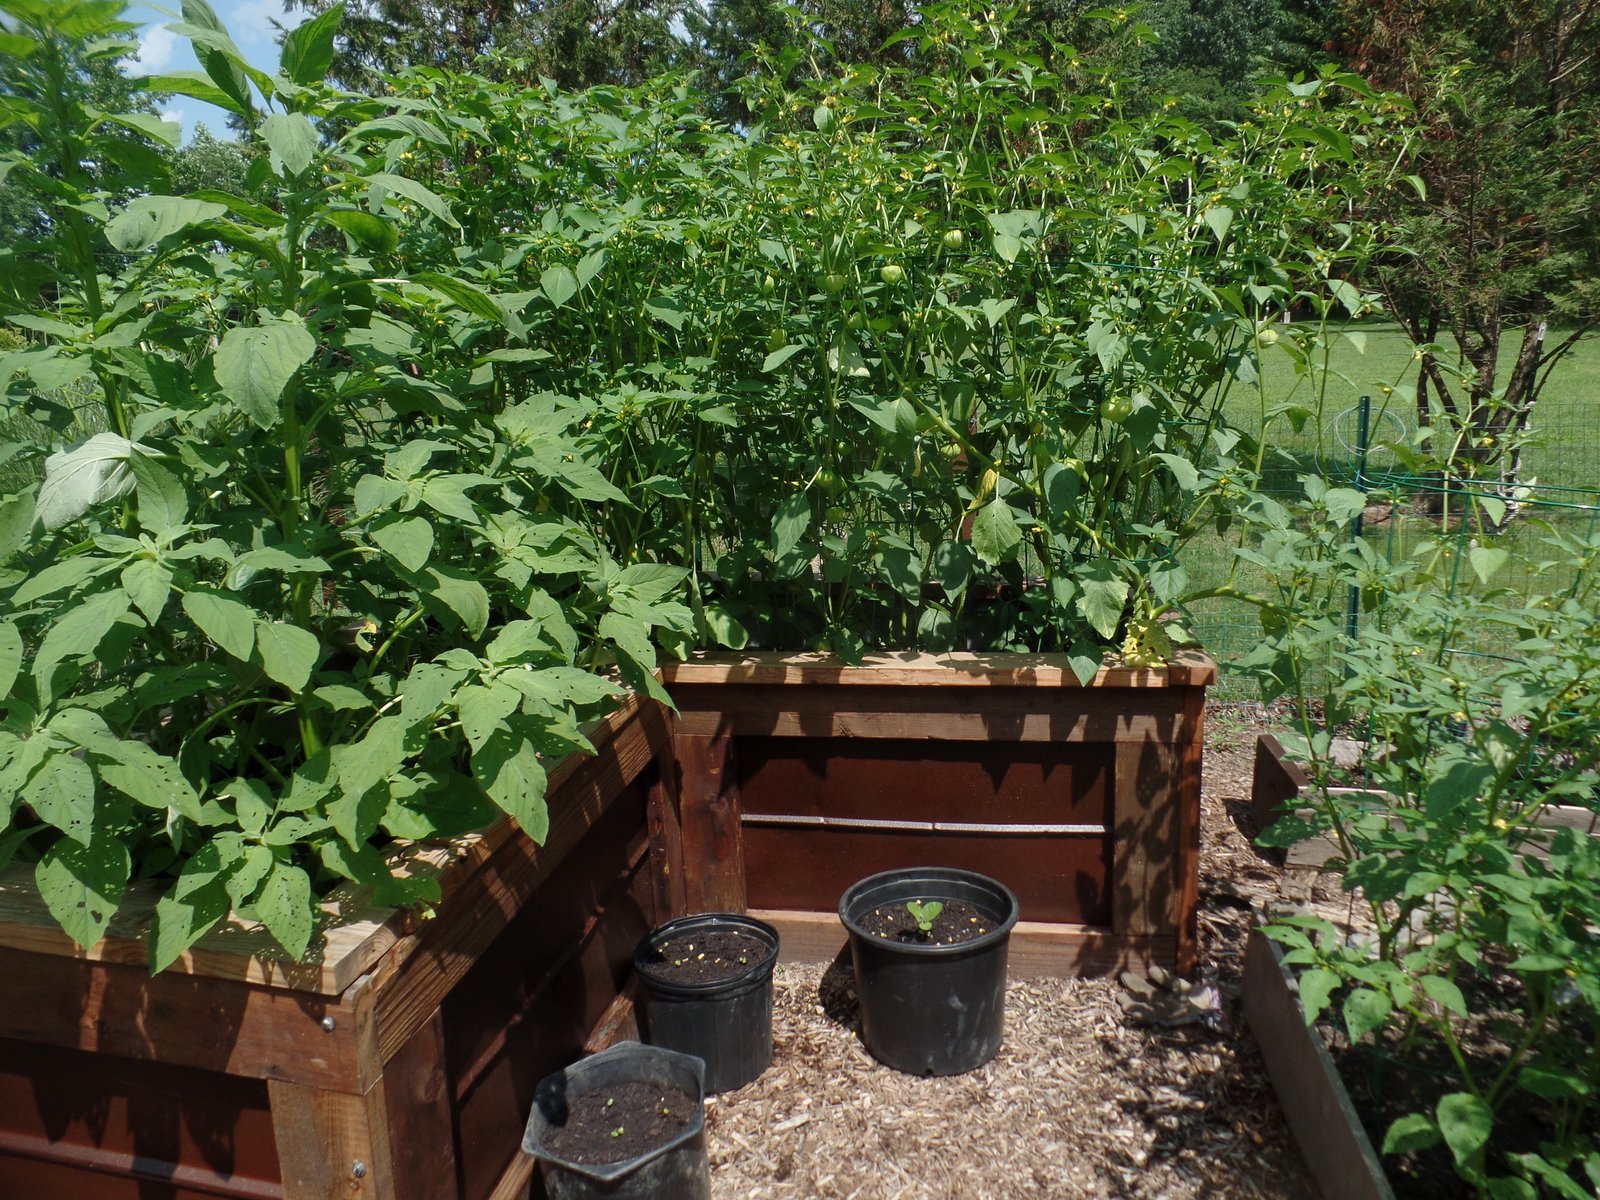
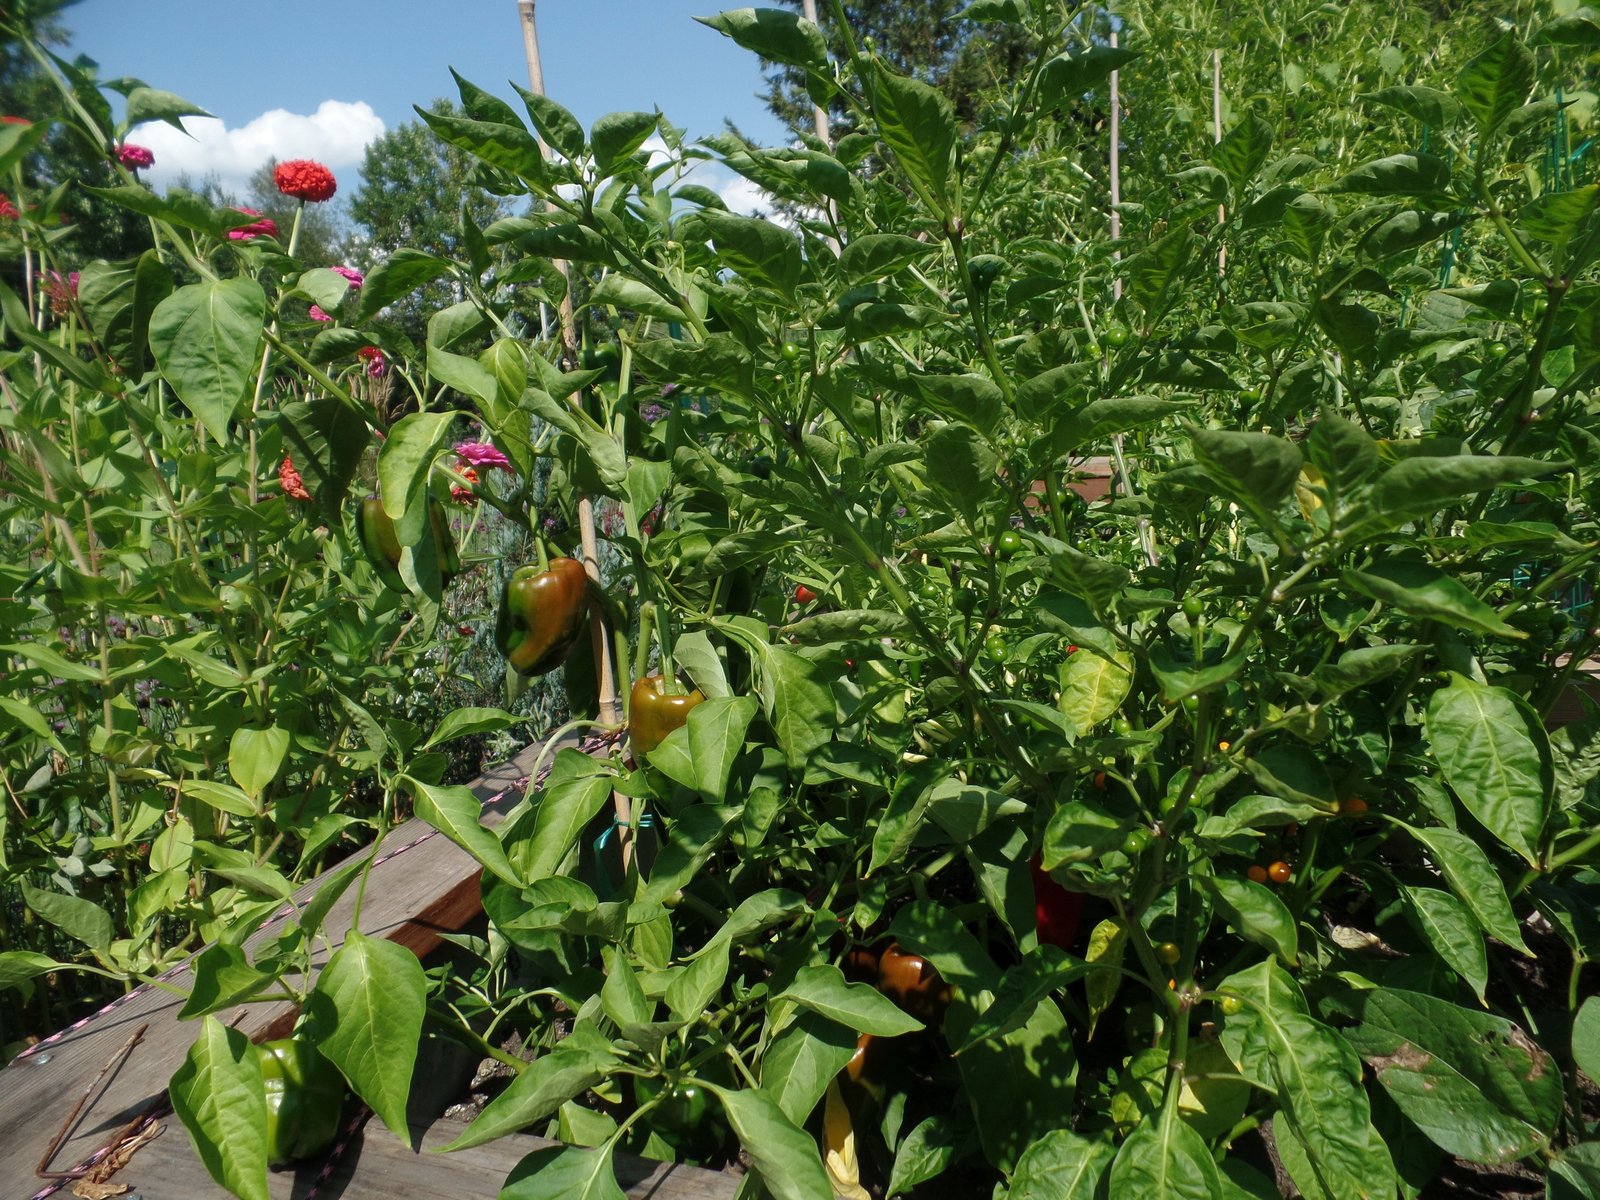
So that’s about it. Last summer we grew peppers, soy beans, and tomatillos in the first two of the new raised beds. This year the tomatoes, okra, squash and what ever else we grow will get planted in the recently completed beds. I may need to get out the ladder when we harvest okra.